Optional
Building for iOS
Building for iOS requires a few extra steps:
- You can change which maps api will the sdk use (Apple or Google maps) from the unity editor menu:

- You must use Metal Graphics API (You can change it in Build/PlayerSettings/OtherSettings)
- Create the xcode workspace.
- The steps below in bold are only necessary if you want to use google maps api otherwise skip to step “pod install” step
- Open the terminal on MacOs.
- If you don’t have cocoapods installed. You need to write “sumo gem install cocoapods”.
- Use “cd” until you reach the project path. Example: “cd downloads/ProjectExample/”.
- If one of your folders has a space you need to add ‘’ in the path.
- Example: cd ‘downloads/Project Example/’.
- Now you can use “pod init” to create a podfile file inside the project path.
- Open podfile file and change the lines for this:
source ‘https://github.com/CocoaPods/Specs.git’
platform :ios, ‘12.0’
target ‘UnityFramewok’ do
pod ‘GoogleMaps’, ‘5.0.0’
end
This is needed in order to install Google Maps in your xcode project and Calibration to work.
- Now type “pod install” in the terminal. If you get the following error, then you should update cocoa with this command: “pod repo update”.

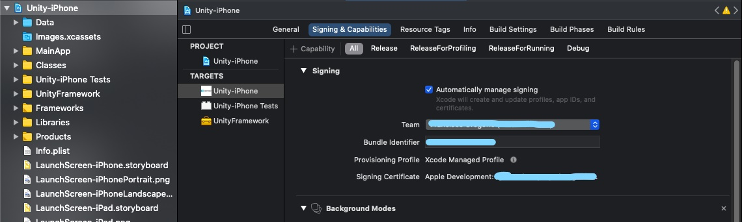
- Now you need to create the certificate in Signing & capabilities on Unity-iPhone target
- The only thing left is to add the marker image on “Images.xcassets”. You need to drag the image to Images.xcassets and the image must have this name “markerPin” to be recognized as a marker on Google Maps.
- You should be able to run the project on your device
Important: If you want to launch your app to the AppStore or Testflight you will need to request Apple approval to use the SensorKit, otherwise you won’t be able to create the provisioning profile with the entitlement. The app will crash when you try to open it without the profile entitlement.
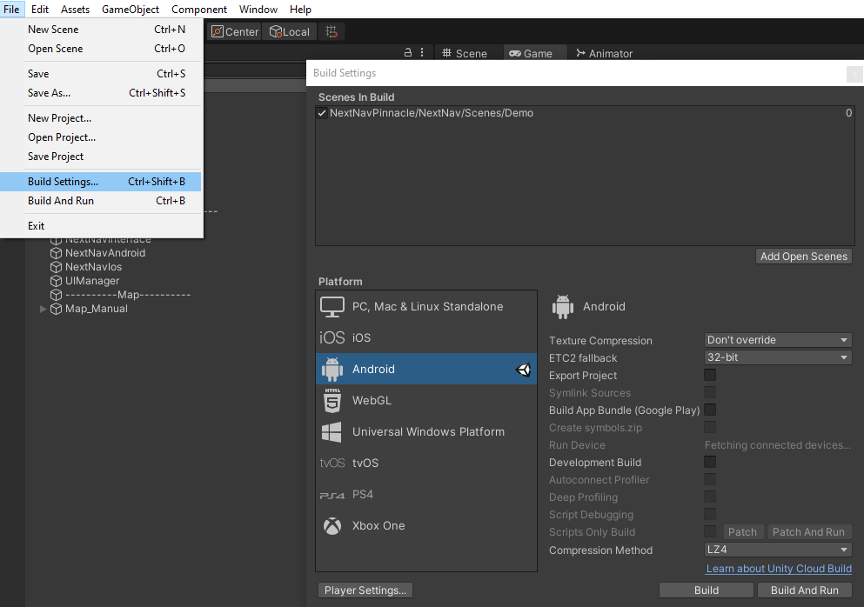
Building for Android
In order to build for Android go to File => Build Settings and then press Build. No additional steps are required.
Which SDK versions should I use?
The min sdk supported is 22 and the target sdk supported is 31 or earlier.
The last thing about android that you should know is that we use an android manifest located in Assets\Plugins\Android.
Important Note:
We have 4 folders on this path: “Assets\NextNavPinnacle\NextNav\Unity Different Versions Support” which are to support different versions of unity, in case that you have any problems with gradles, android manifest or build errors related to this, you can try replacing the files, but you don’t need to do anything, because this is handled automatically when you import the asset. Maybe the only thing you may need to do is add the platform android to the .aar library located on the final path “Assets\Plugins\Android”.
Creating the Google Maps API Key
Below is a summary of steps to get you started. Reference the Link for the official Google documentation.
- Open the Google Developer Console – Link
- You will need an account so create or use one that you already have
- Then create a project that will have the linked google api key
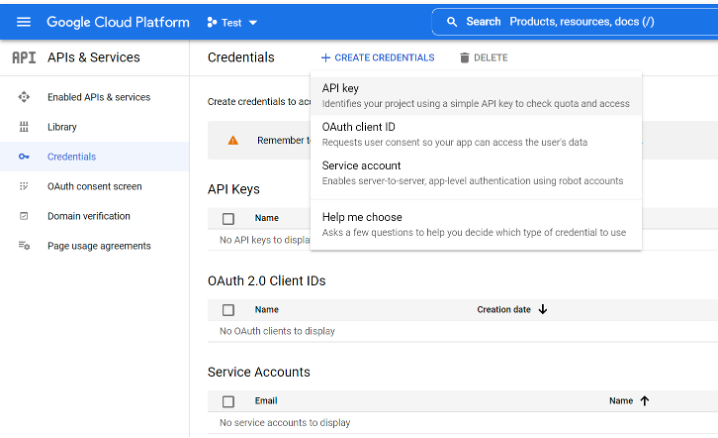
- Go the left panel on the top and select Api & Services / Credentials, then create new credentials like this:
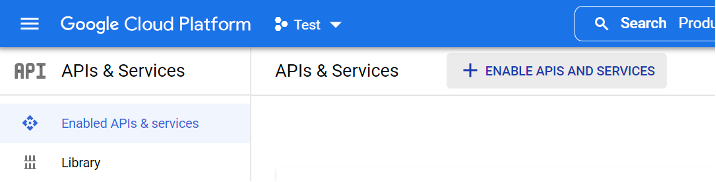
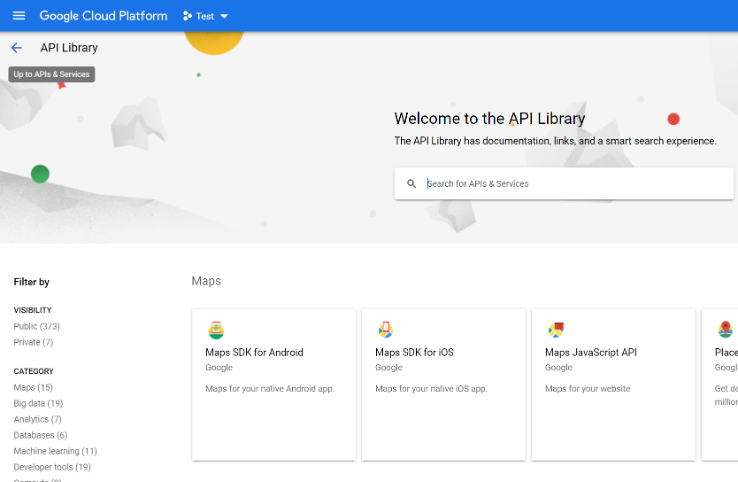
- Then go again to Api & Services but now select Panel and click on “Enable Api & Services”
- Now search for “Google Maps iOS” & “Google Maps Android” and enable both to be able to use google maps calibration screens in the plugin.
- Done! Now you can use the Google Maps API in your project.
Testing the Demo Scene
Below is a summary of steps to get you started. Reference the Link for the official Google documentation.
- Open the Google Developer Console – Link
- You will need an account so create or use one that you already have
- Then create a project that will have the linked google api key
- Go the left panel on the top and select Api & Services / Credentials, then create new credentials like this:
- Then go again to Api & Services but now select Panel and click on “Enable Api & Services”
- Now search for “Google Maps iOS” & “Google Maps Android” and enable both to be able to use google maps calibration screens in the plugin.
- Done! Now you can use the Google Maps API in your project.